
Using the FINTRAC Web Reporting System
From: Financial Transactions and Reports Analysis Centre of Canada (FINTRAC)
Note: As the FINTRAC Web Reporting System is regularly enhanced and new features are integrated, some of the figures in this guide may appear differently in the system.
Reporting entities who have reports to submit and need to access the FINTRAC Web Reporting System must first contact FINTRAC by email at F2R@fintrac-canafe.gc.ca.
Learn about the main sections and features of the FINTRAC Web Reporting System to submit reports electronically to FINTRAC.
On this page
- What is the FINTRAC Web Reporting System
- Access the FINTRAC Web Reporting System
- Navigate the FINTRAC Web Reporting System
- Complete and submit reports to FINTRAC
- Manage reports
- Appendix A
- Related guidance
What is the FINTRAC Web Reporting System
The FINTRAC Web Reporting System allows you to individually submit reports electronically to FINTRAC. It is a secure system that is geared towards reporting entities with lower reporting volumes. If you need to submit high volumes of reports, please consult FINTRAC API report submission.
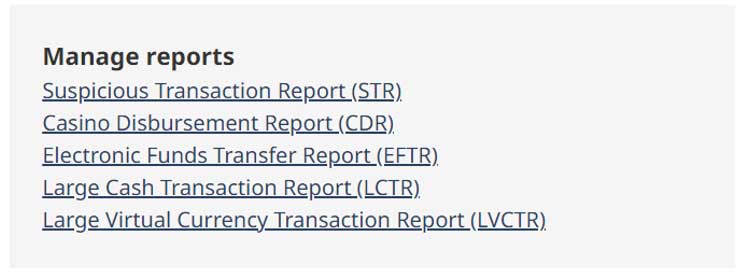
The FINTRAC Web Reporting System is available to submit Suspicious Transaction Reports, Electronic Funds Transfer Reports, Large Cash Transaction Reports, Casino Disbursement Reports and Large Virtual Currency Transaction Reports.
Access the FINTRAC Web Reporting System
The FINTRAC Web Reporting System is available for current users to submit Suspicious Transaction Reports, Electronic Funds Transfer Reports, Large Cash Transaction Reports, Casino Disbursement Reports and Large Virtual Currency Transaction Reports. Reporting entities who have reports to submit and need to access the FINTRAC Web Reporting System must first contact FINTRAC by email at F2R@fintrac-canafe.gc.ca.
Navigate the FINTRAC Web Reporting System
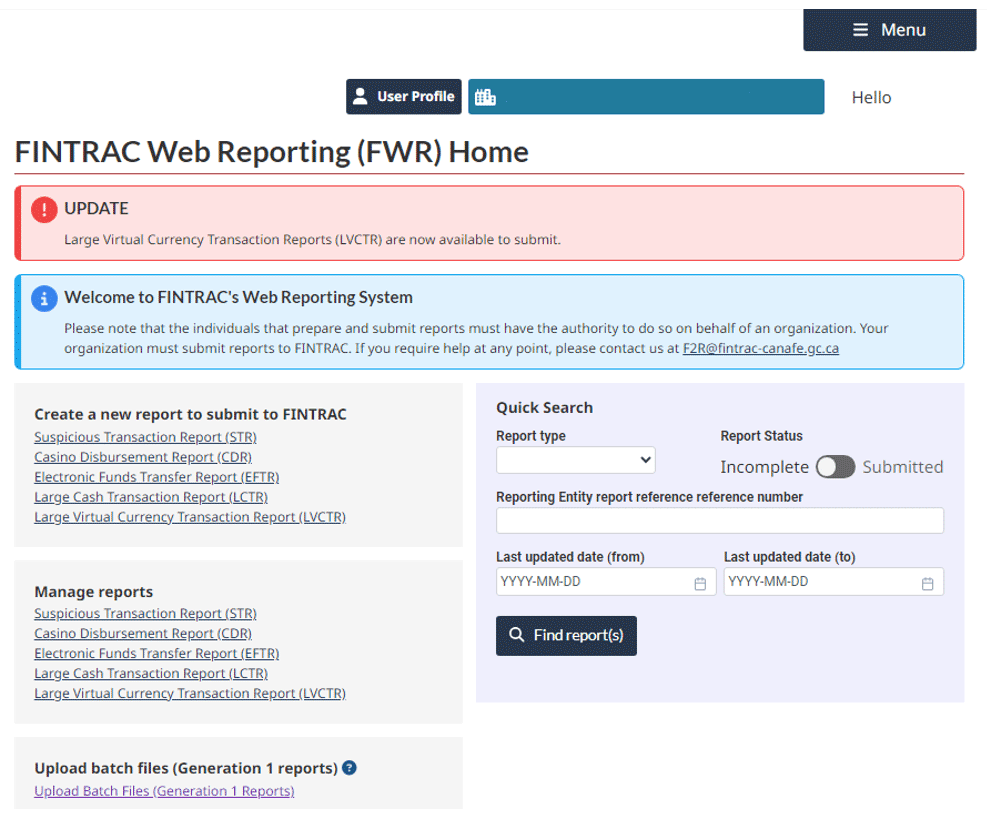
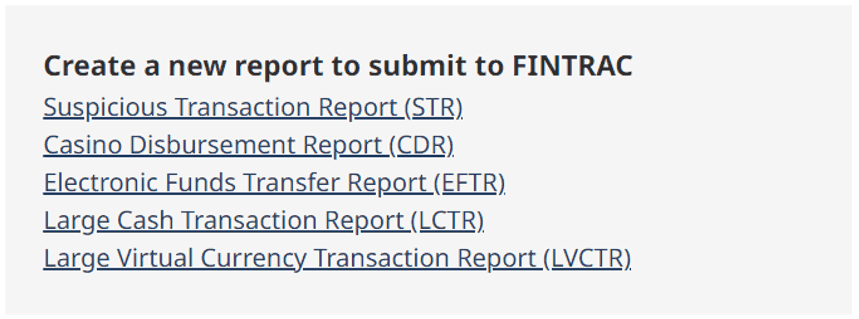
Once you’ve accessed the FINTRAC Web Reporting System with the link provided to you by FINTRAC, the following options allow you to complete, view, change, submit, and find financial transaction reports (see Figure 1):
- Create a new report to submit to FINTRAC provides links to the available report types that can be submitted by your organization. Select the type of report you wish to submit.
- Manage reports provides a list of incomplete reports created by your organization.
- Upload batch files (Generation 1 reports) allows former CloudMask users to upload .xml, .json, .dat or .data report files (depending on the report type) using drag and drop or manual selection.
- Quick search allows you to search for reports previously submitted by your organization using your report reference number and/or a date range.
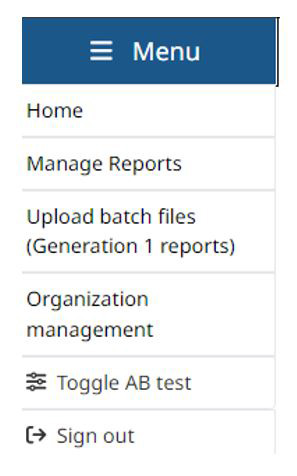
Using the main menu in the top right corner, you can sign out from the system or navigate to the following pages (see Figure 2):
- Home
- Manage reports
- Upload batch files (Generation 1 reports)
- Organization management
Report on behalf of multiple organizations
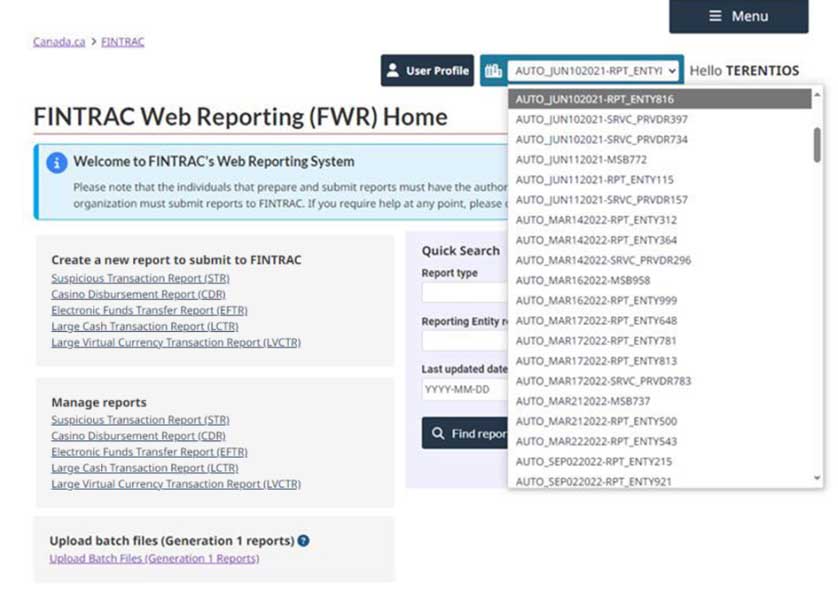
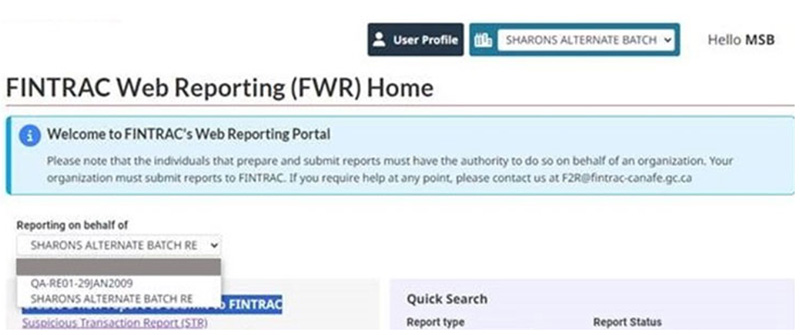
If your email address is associated with multiple organizations, use the organization drop-down menu located in the top right corner to select the organization for which you want to submit or manage reports (see Figure 3). If you are a service provider, use the additional Reporting on behalf of drop-down menu to select the organization on behalf of which you are reporting (see Figure 4).
Organization management
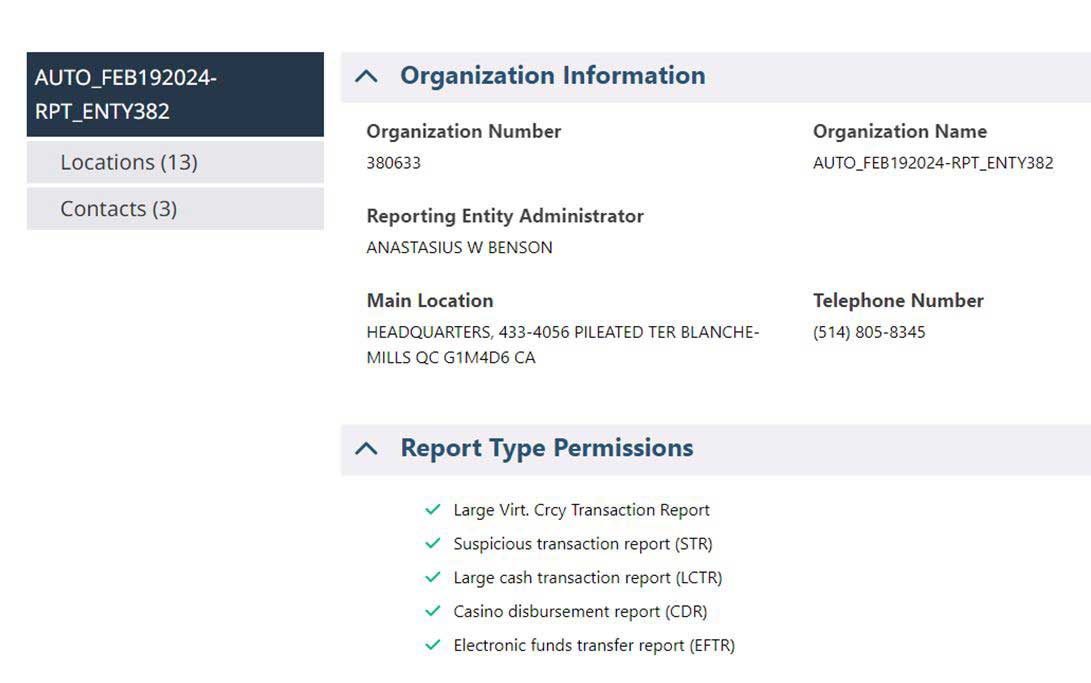
The Organization management page allows you to view your organization’s information and the report types permitted for online submission.
From the left side navigation menu, select Locations to manage your organization’s locations for report submission.
Locations
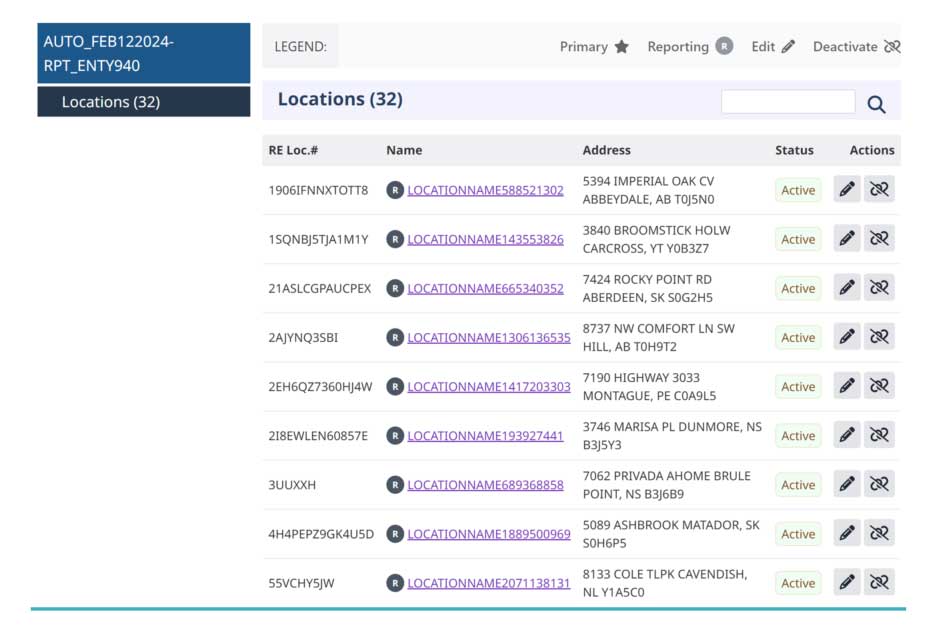
From the Locations page, you can add and maintain locations for report submissions (see Figure 6).
- Search locations by using the search bar. It allows you to search locations on location number, location name and address.
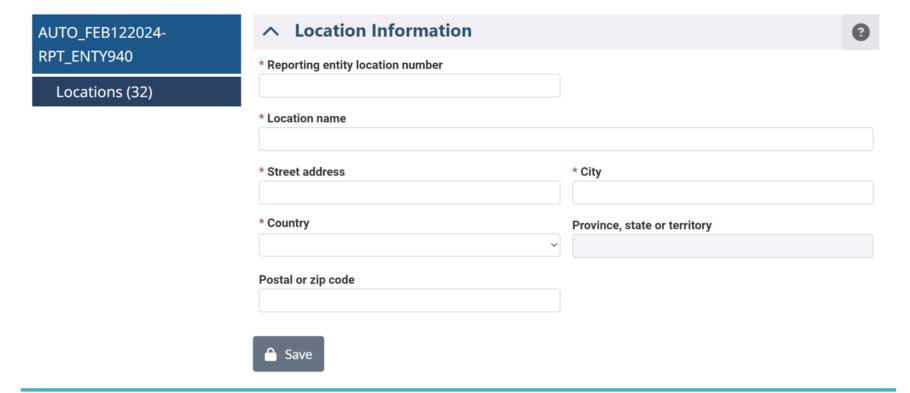
- Add a new location by selecting the +. When selected, a data entry screen appears (see Figure 7).
- Modify a location by either selecting the location name or the edit icon. When selected, a data entry screen appears (see Figure 7).
- Deactivate a location by selecting the deactivate icon.
- View inactive locations by selecting the Show inactive locations button.
Contacts
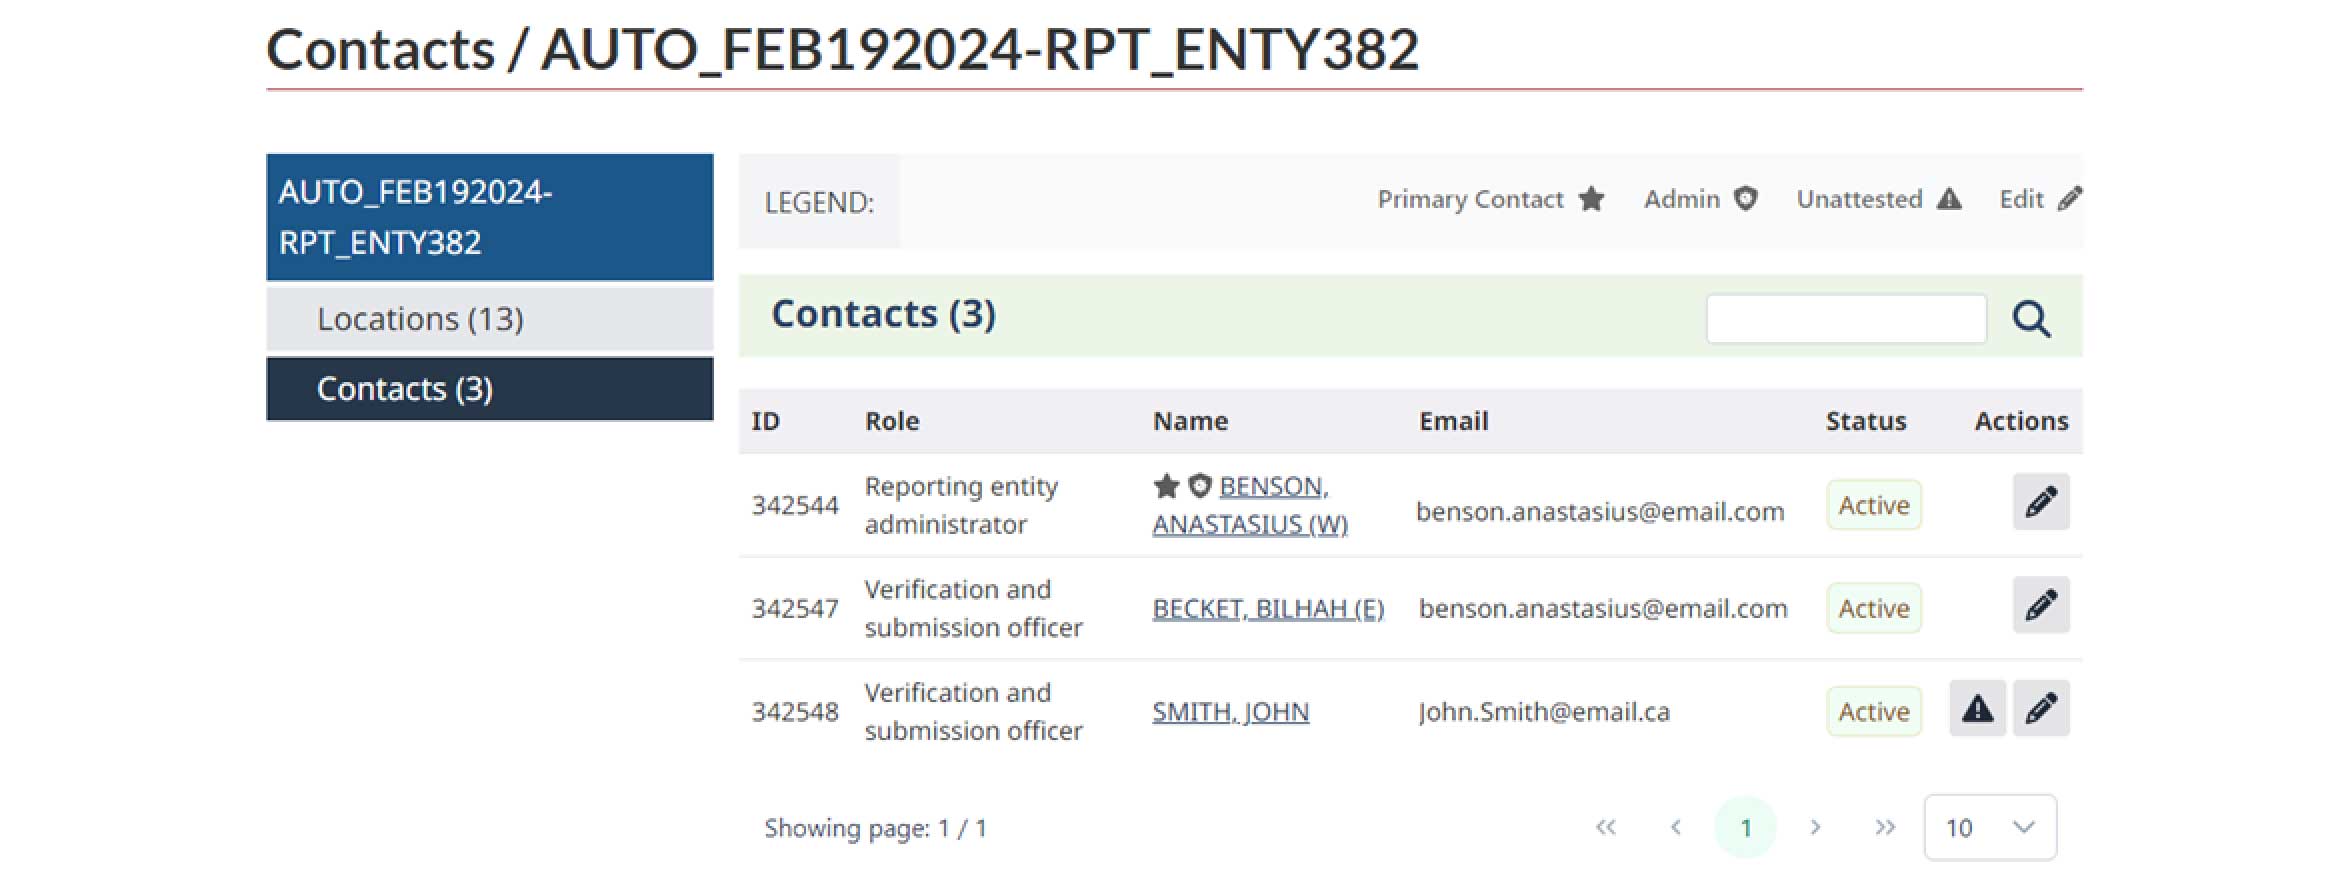
The Contacts page displays your organization’s reporting entity administrator and any existing verification and submission officers and data entry officers associated with your organization prior to March 2, 2024, as well as any newly created verification and submission officers and data entry officers. Before verification and submission officers are able to view, complete, and submit reports, their identity will need to be verified and attested to by the reporting entity administrator. Before data entry officers are able to prepare reports, their identity will need to be verified and attested to by the reporting entry administrator. An unattested verification and submission officer or data entry officer will have a warning symbol next to their status (see Figure 8).
Note: that "Active" status does not mean "Attested". Contacts can appear as active and still be unattested, as shown in Figure 8.
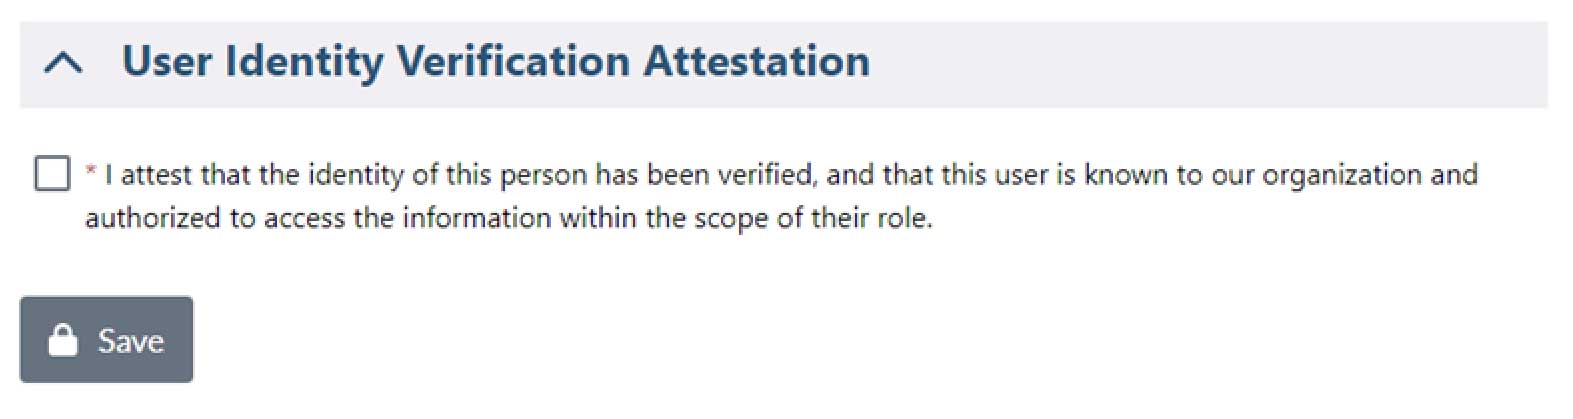
To attest the identity of a verification and submission officer, select the Edit contact button at the bottom of the page under the User Identity Verification Attestation section. Select the checkbox to attest that the identity of the officer has been verified, that the officer is known to your organization and is authorized to access the information within the scope of their role. Select Save and return to the Contacts page to see the verification and submission officer’s updated status (see Figure 9).
The verification and submission officer will receive a FINTRAC Web Reporting System enrollment email.
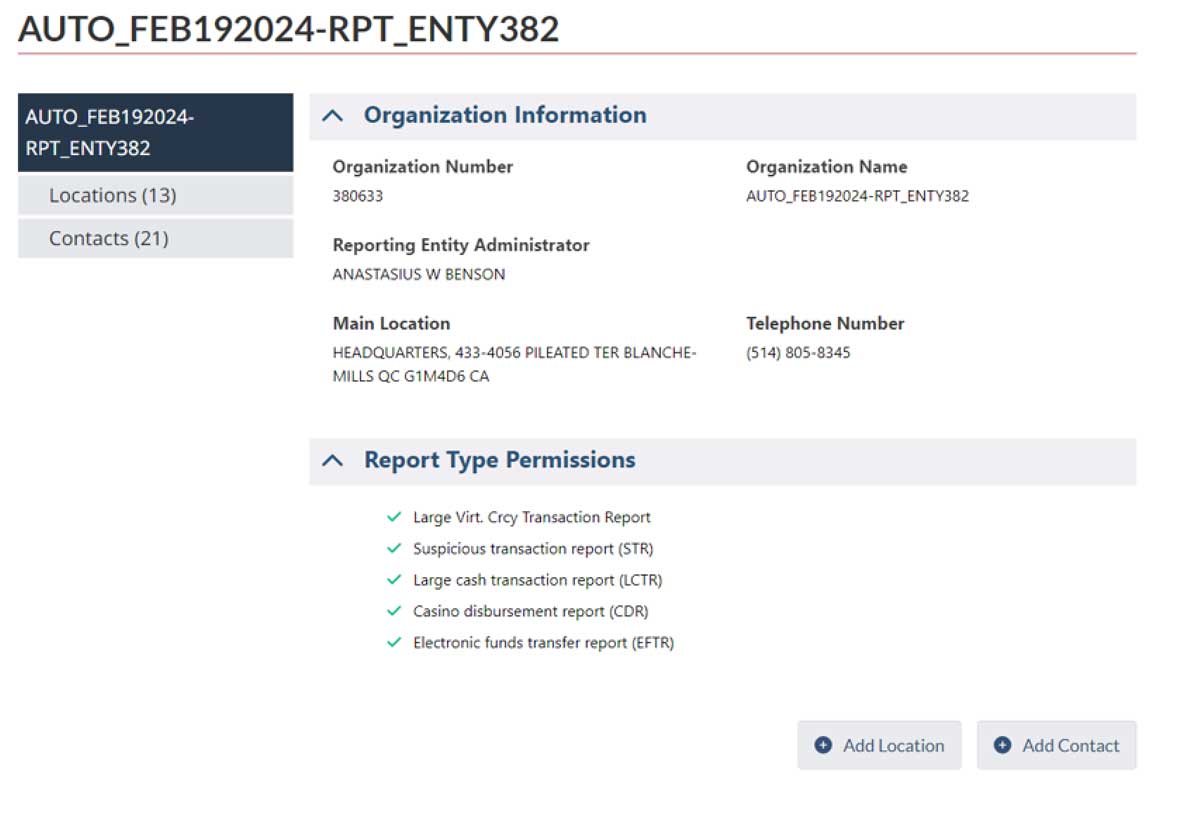
A new contact can be created by the reporting entity administrator in the Organization management section under Menu.
On the main page of Organization management you can add a new contact using the Add Contact button in the bottom right hand side of the page.
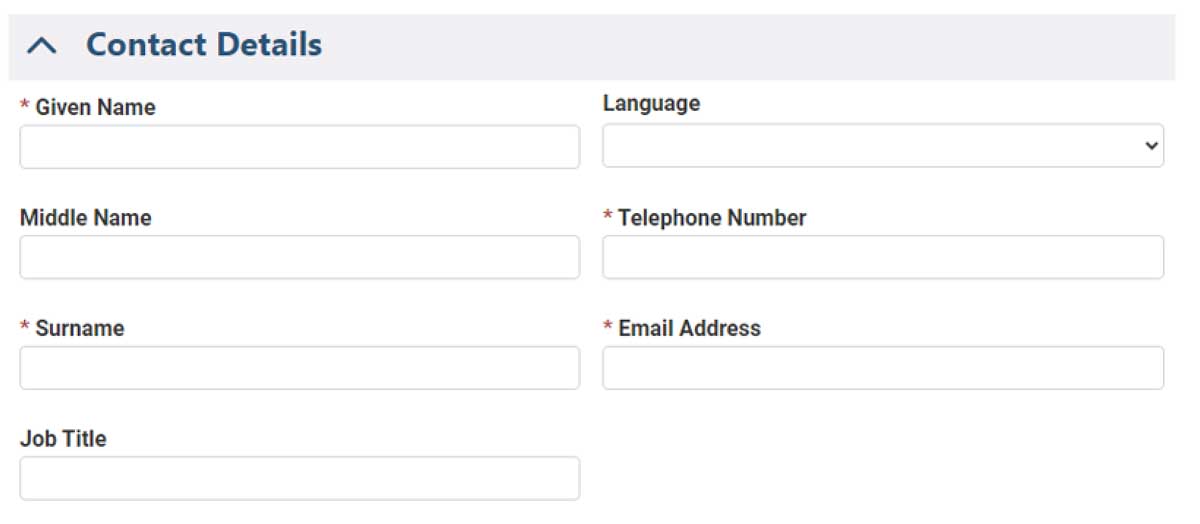
This will take you to the Add New Contact page. Here you can enter the information for your new user and also assign them a reporting role. In the contact details section, the following information is required: Given Name, Surname, Telephone Number and Email Address. Please note that the email address must be unique and cannot be used by any other contact in your organization.
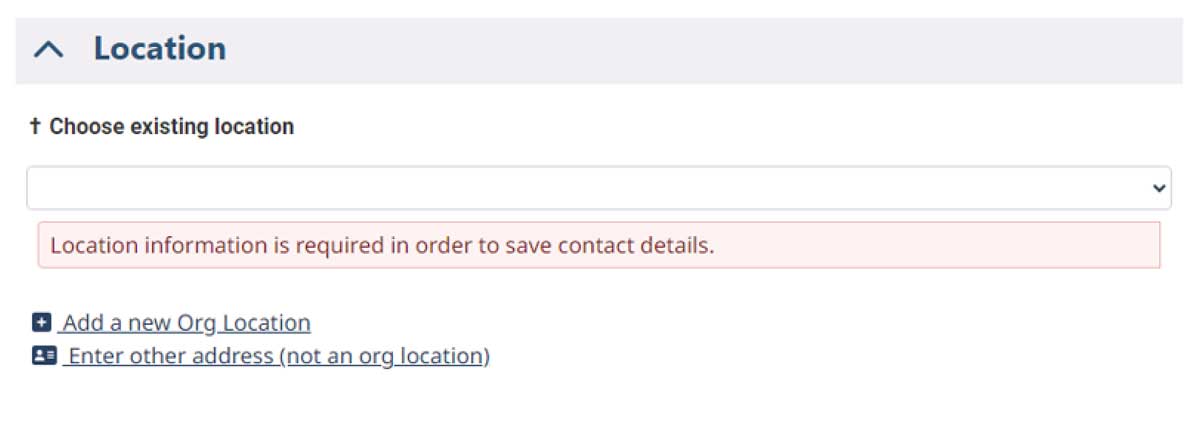
Next, you will be required to provide a location for the contact in order to save the contact details. You may choose an existing location from the drop down list or add a new location.
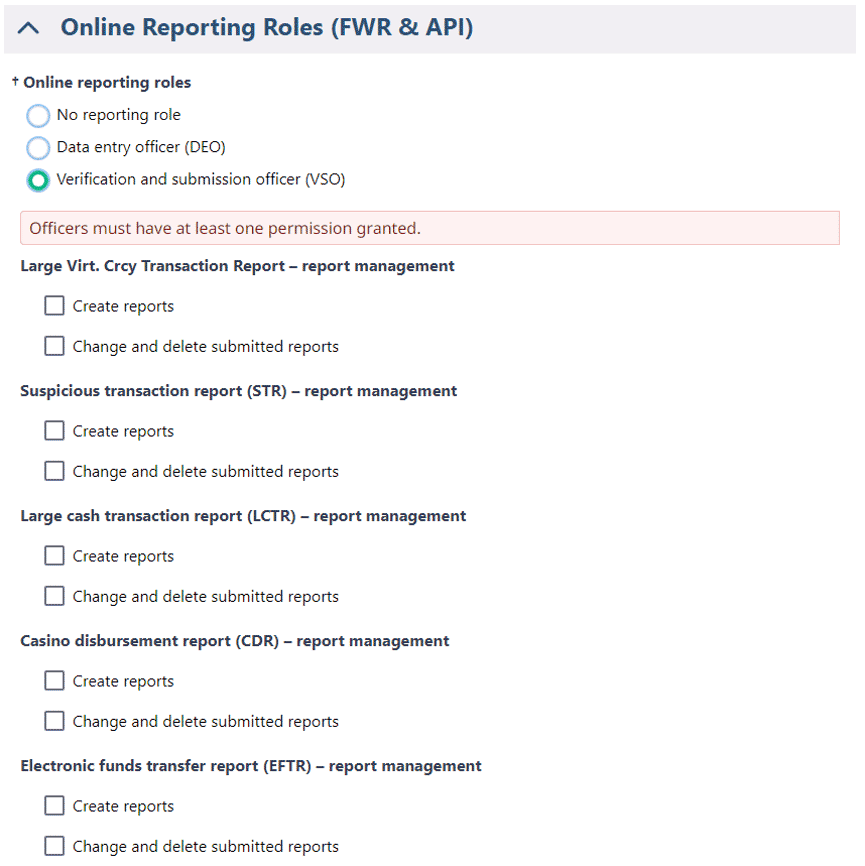
The final section is for online reporting roles. This allows the reporting entity administrator to assign the verification and submission officer role or the data entry officer role. A user must have one of the two roles in order to log into the system. A table of role permissions for the verification and submission officer and data entry officer roles can be found below. Once a role for the new contact has been assigned, select which reporting permissions the new contact will have for each report type. The permissions are to create reports, and to change and delete submitted reports.
Note: Data entry officers can only create reports.
Once the role and permissions have been assigned, the reporting entity administrator will need to attest and save the new contact (see Figure 9). Once this step is complete, an email is sent to the new user. Users will be able to log in and access the FINTRAC Web Reporting System according to the role and permissions assigned.
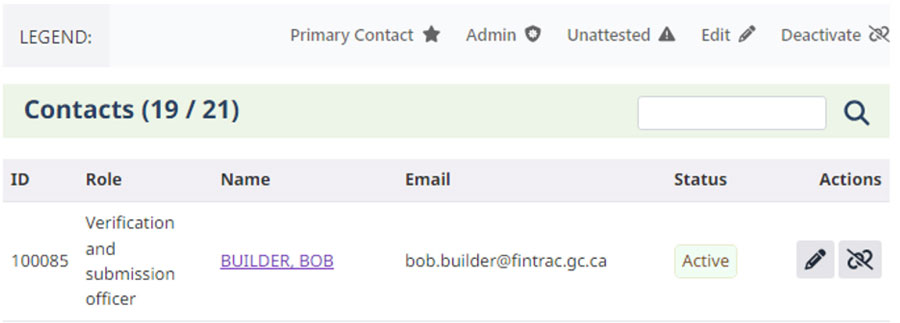
Reporting entity administrators can deactivate a contact that no longer requires access to the FINTRAC Web Reporting System in the Organization management section under Menu. Locate the contact to be deactivated in your contact list and click the Deactivate icon (see Figure 14). A confirmation prompt will appear on screen in order to proceed. Once confirmed, the contact will no longer have access to the FINTRAC Web Reporting System.
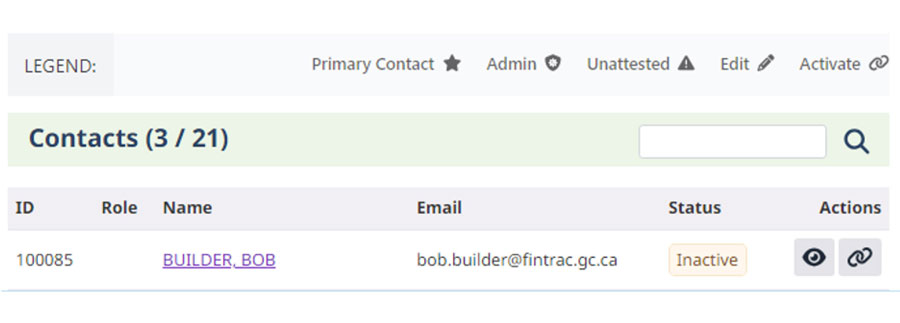
Should you wish to reactivate a contact, click the Show Inactive Contacts button at the bottom of your contact list. Locate the contact you wish to reactivate and click the Activate icon (See Figure 15). A confirmation prompt will appear on screen in order to proceed. Once confirmed, the contact will once again have access to the FINTRAC Web Reporting System.
Reporting entity administrators, verification and submission officers and data entry officers can perform the following tasks:
| Task | Reporting entity administrator | Verification and submission officer | Data entry officer |
|---|---|---|---|
| View locations | Yes | Yes | Yes |
| Add and edit locations (except main location) | Yes | Yes | No |
| View contacts | Yes | Yes | No |
| Add, attest and edit contacts (except setting primary contact) | Yes | No | No |
| Deactivate/reactivate a contact | Yes | No | No |
| Create a new report | Yes | Yes | Yes |
| View an incomplete/validated report that you created | Yes | Yes | Yes |
| Modify an incomplete/validated report that you created | Yes | Yes | Yes |
| View an incomplete/validated report that someone else created | Yes | Yes | No |
| Modify an incomplete report that someone else created | Yes | No | No |
| Modify a validated report that someone else created | Yes | Yes | No |
| Submit a valid report | Yes | Yes | No |
| View submitted reports | Yes | Yes | No |
| Change submitted reports | Yes | Yes | No |
| Delete submitted reports | Yes | Yes | No |
Using the main menu in the top right corner, you can sign out from the system or navigate back to the home page.
Complete and submit reports to FINTRAC
From the FINTRAC Web Reporting System home page, select the type of report you wish to submit (see Figure 16).
This opens the Report details section of the selected report (see Figure 17).
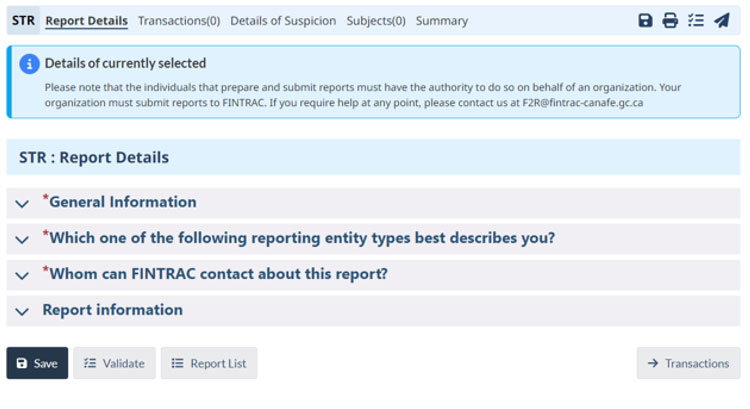
Each section of the Report details tab can be expanded to reveal fillable form fields.
Please note that fields marked with an asterisk symbol (*) are mandatory and must be completed, while those marked with a dagger symbol (†) are mandatory if applicable. You must take reasonable measures to obtain the information for all non-mandatory fields in the report, if they are applicable. Hovering over the question mark (?) symbol shows additional information about the field.
For detailed instructions on the main sections and the type of information required in each field, please refer to: Transaction reporting.
Report details navigation menu
When you fill out a report, you can use the navigation menu at the top of the screen to move between the main sections:
- Report details
- Transactions
- Details of suspicions (only available in the Suspicious Transaction Report)
- Subjects
- Summary
You can also view a summary of the report you are working on. The icons in the right corner allow you to save, print, validate or submit the report (see Figure 19).

Report Details
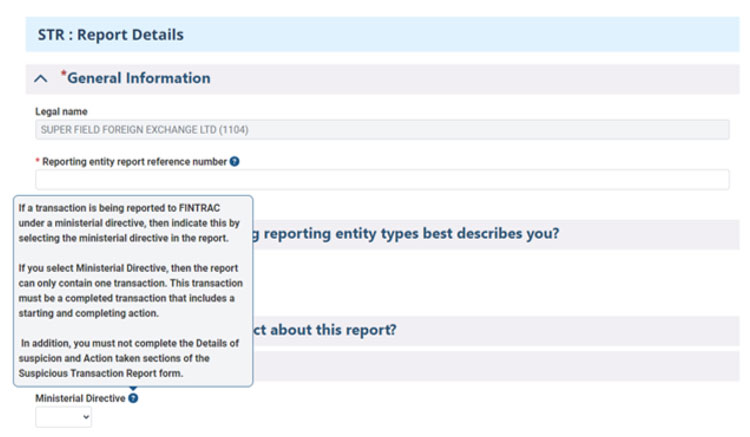
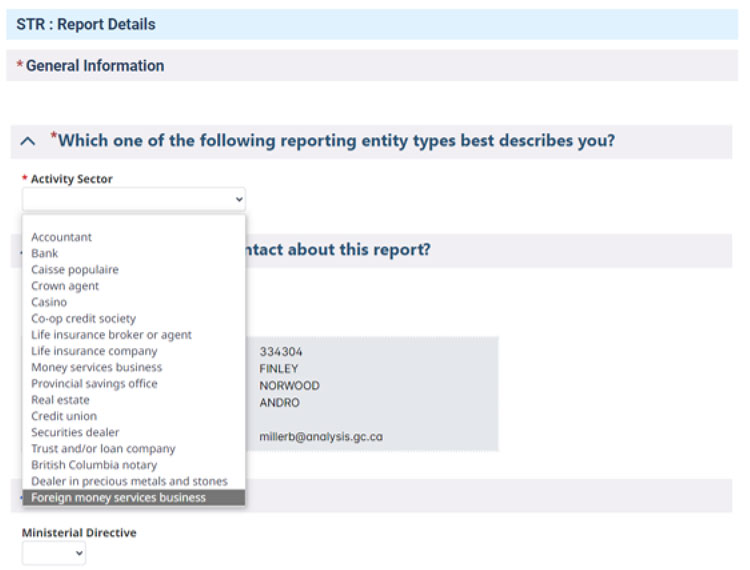
In the Report details section enter your reporting entity report reference number and select your activity sector from the drop-down menu. You must also indicate if your report is being triggered by a Ministerial Directive (see Figure 20).
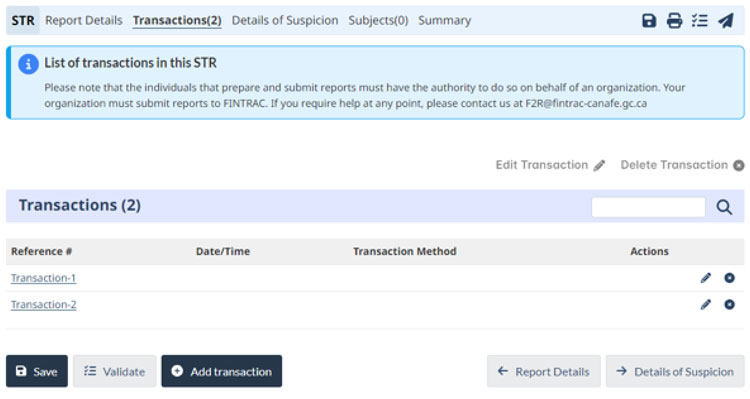
Transactions
The Transactions section allows you to add one or more transactions in a report. Use the plus + and x buttons to add or delete transactions (see Figure 21).
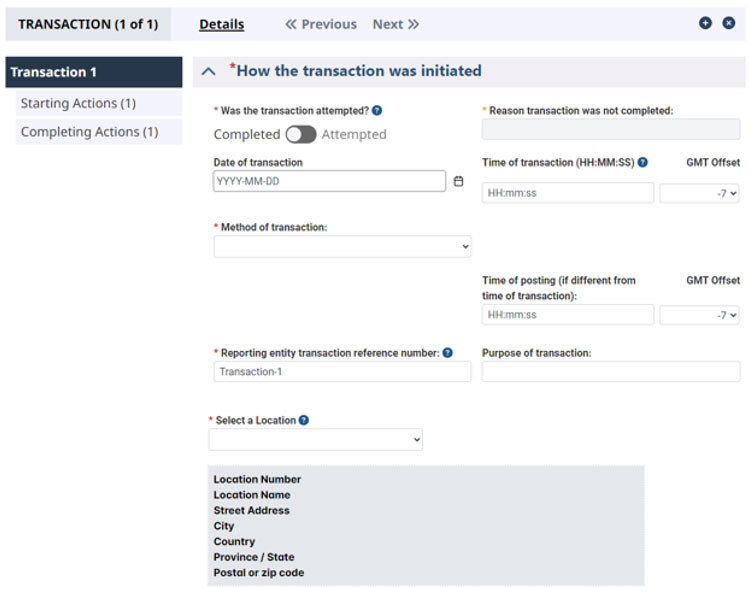
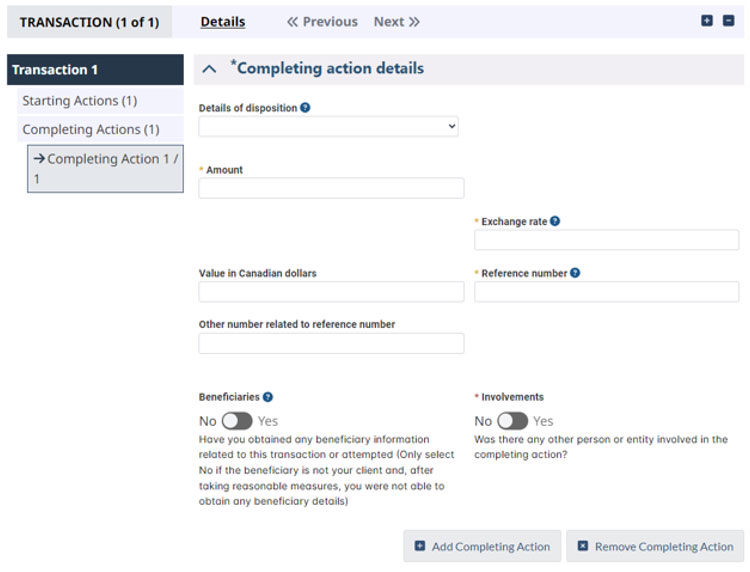
Fill out the form fields as applicable, using the side navigation menu to add details on the transactions starting and/or completing actions (see Figure 22).
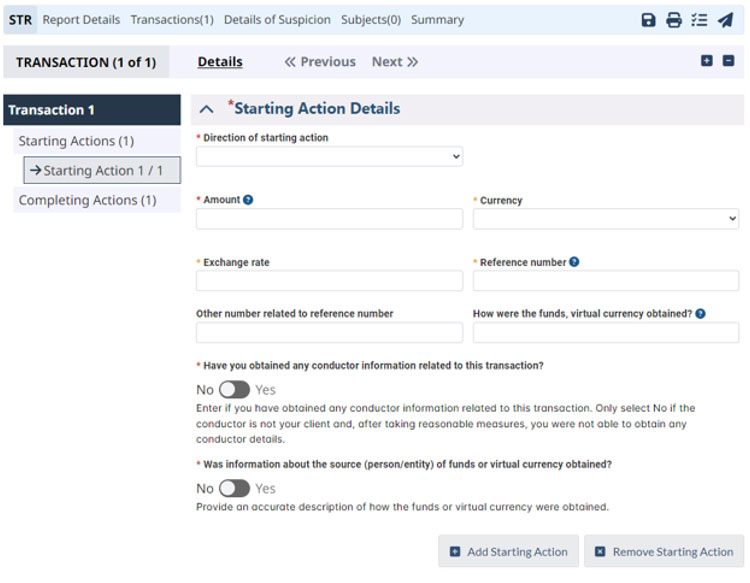
Use the Add and Remove buttons at the bottom of the page to add or delete additional Starting and/or Completing actions. When you navigate between Previous and Next transactions, the information is automatically saved (see Figure 23).
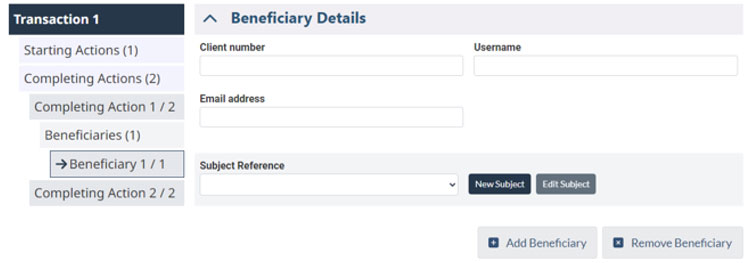
Use the corresponding Add or Remove buttons on each sub-section’s page to add or delete elements within each Starting and Completing action. For example, you can add or remove a beneficiary (see Figure 24).
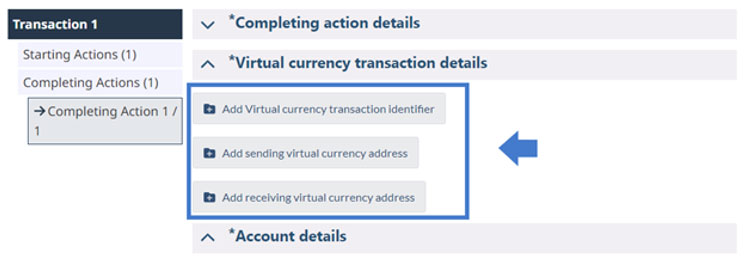
The disposition details you select will also change the types of sub-fields available to be filled. For example, a Virtual currency transaction details field appears if Added to virtual currency wallet is selected as the disposition type (see Figure 25).
Use the bottom navigation buttons to save and validate your form fields, and use Return to list to view a full list of all the transactions that have been added to the report (see Figure 26).
Details of suspicion (Only available in the Suspicious Transaction Report)
The Details of suspicion section is where you can enter the narrative that explains your grounds for suspicion that led to your decision to submit a Suspicious Transaction Report to FINTRAC (see Figure 27).
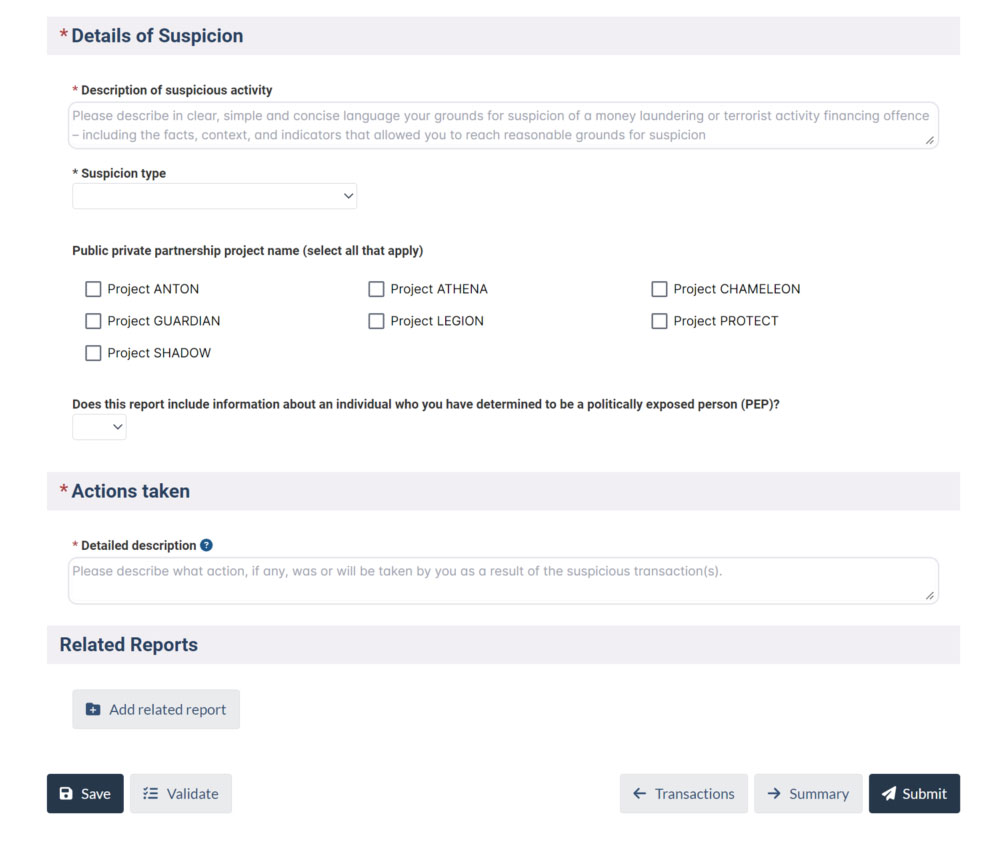
In this section, you can indicate:
- A description of the suspicious activity in free form. You can provide a description of the following elements:
- facts
- context
- indicators that allowed you to reach the reasonable grounds for suspicion of a money laundering, terrorist activity financing or sanctions evasion offence
- Suspicion type: Indicate whether the suspicious activity is related to money laundering, terrorist activity financing or sanctions evasion
- Public-private partnership project names: Indicate any public-private partnership project that is relevant to your report.
- Actions taken: Describe what action, if any, was or will be taken by you as a result of the suspicious transaction(s).
- Related reports: Add previously submitted reports and transactions that are related to the suspicious activity in this report by selecting Add related report.
Note: The Details of suspicion section of the Suspicious Transaction Report form must not be completed if the transaction is being reported to FINTRAC under a Ministerial Directive.
For more information on completing the Details of suspicious transaction section, please refer to the following guidance: Reporting suspicious transactions to FINTRAC.
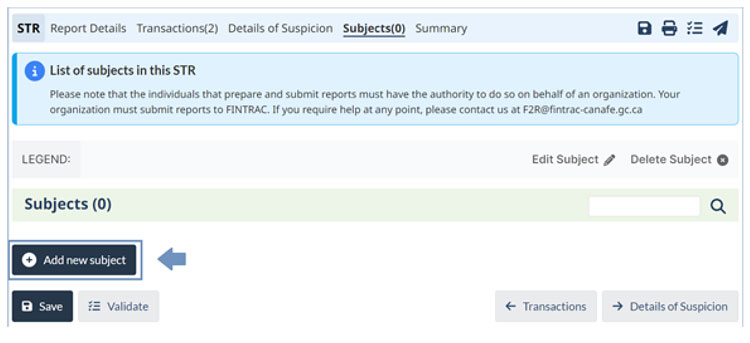
Subjects
The Subjects section lets you create different subject profiles to help streamline the entry of information in the report fields. Please note that subjects can also be created in the Transactions section – and that this will automatically add them to the list of subjects under the Subjects section (see Figure 28).
A subject is a person or entity involved in a transaction and must be included in the report. Subjects can be:
- conductors
- requesters
- third parties
- receivers
- beneficiaries
- all sources of cash
- others involved in the transaction
- account holders
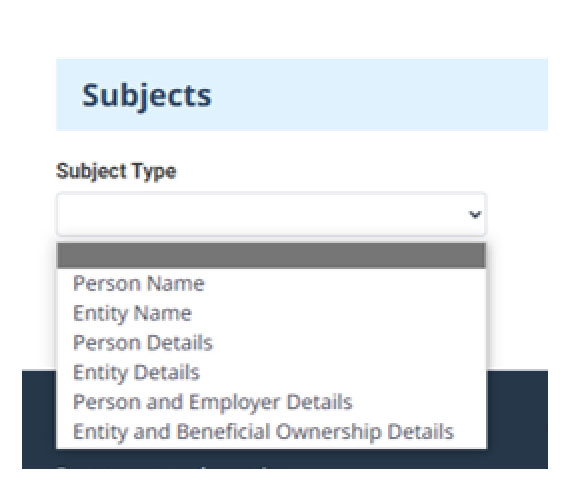
When you select the Add new subject button, you will be able to select a subject type from the drop-down menu. The type you select will change the information fields that can be populated. When you finish entering the information, select save to create the subject (see Figure 29).
Subjects can also be created within each transaction’s Starting and Completing action. For example, you can select, edit, or create a subject to reference under Account holders or Conductor subject details (see Figure 30).

Previously created subjects can be reused as you navigate through each section of the report, and the subject’s information will auto populate the fields accordingly when selected.
If a person or entity has more than one role in a report (for example, a person is both the conductor and beneficiary in the transaction), the subject profile can be selected to populate fields for all transactions in the same report where it was created. However, subjects in one report will not be available for selection in other reports due to privacy considerations.
Report validation
Validation errors and warnings help ensure accurate and complete reporting and help your organization meet its reporting obligations. You can submit a report when either of the following conditions are met:
- You have no errors or warnings present in your report; or
- You have addressed all warnings, and upon review, have concluded that they do not apply to your report.
Once you have filled out a report, use the Validate button in the report navigation menu or at the bottom of the screen. The System will indicate where information is missing, incorrect, or improperly formatted.
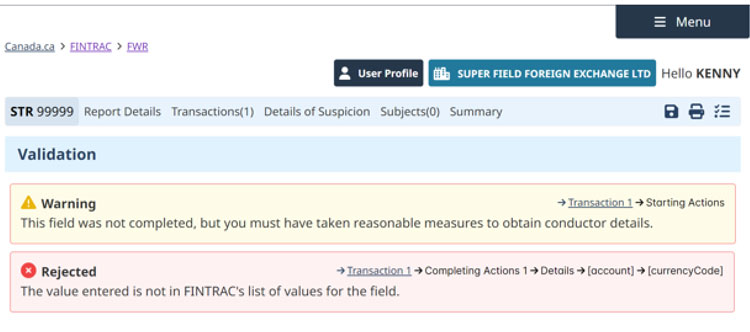
If errors were found through the validation process, you will be notified of the fields that need to be corrected. Select the link in the validation summary to view and address the errors (see Figure 31).
There are two types of validation messages that can be displayed in a financial transaction report:
- Warning: This message will be displayed when if applicable information is not provided or is incomplete. This does not prevent you from submitting the report to FINTRAC. However, if the information is available in your records, you are required to provide it in the report.
- Rejected: This message will be displayed when mandatory information is missing. You will not be able to submit the report until the missing mandatory information is provided.
When the validation process is complete, and no errors remain, you will be able to submit your report to FINTRAC by selecting the Submit button.
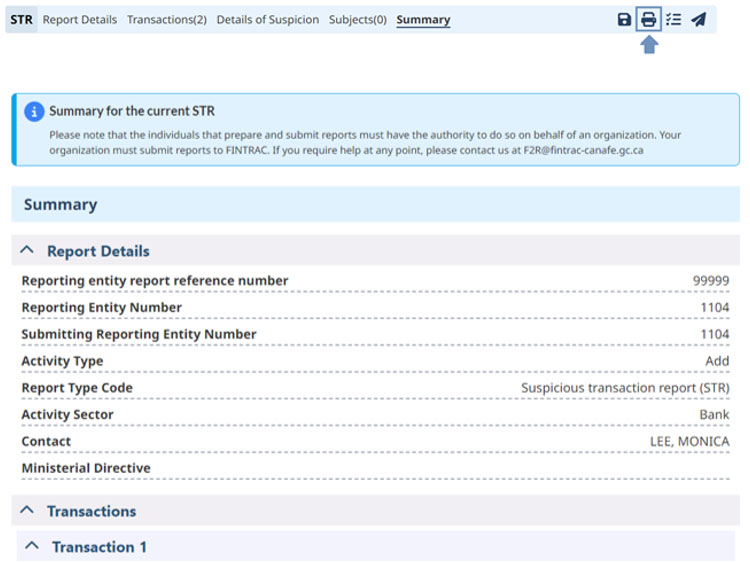
Summary
The Summary section provides an overview of all the information you’ve provided in the report. To print a report, click on the printer icon in the navigation menu (see Figure 32).
Manage reports
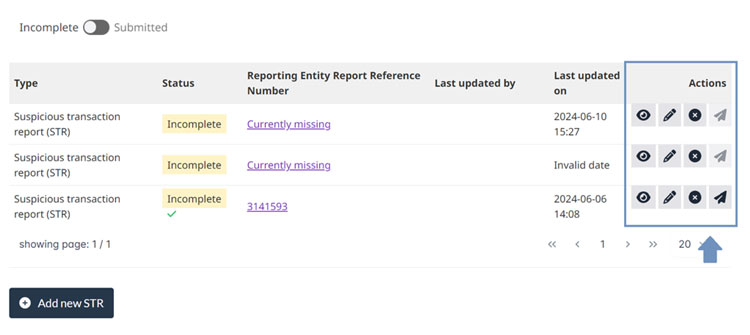
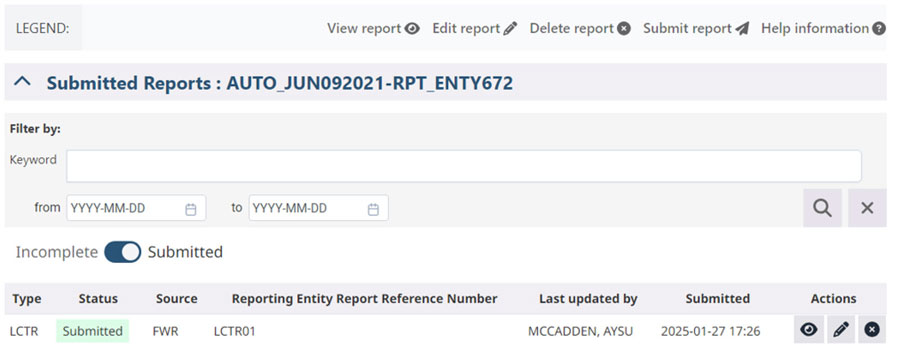
To view, edit, delete, and validate the list of incomplete and submitted reports for your organization, select the report type you wish to manage under Manage reports on the FINTRAC Web Reporting System home page and use the corresponding buttons under the Actions column (see Figure 33).
The filter will allow you to search for reports by keywords such as the report entity report reference number. Use the toggle button to view incomplete reports that have been started by your organization or a list of reports that have already been submitted (see Figures 34 and 35).

Once a report has been submitted, the reporting entity administrator or verification and submission officer can make a change to the report. To do so, they can either search for the report using the Reporting Entity Report Reference Number or view a list of reports in the Manage reports section. After identifying the report that needs modification, click the Edit report icon next to the report (see Figure 36). A confirmation prompt will appear on the screen, and you will need to follow the on-screen instructions to proceed with the change. Once confirmed, the report will re-open, allowing the reporting entity administrator or verification and submission officer to make any necessary changes before re-submitting the report.
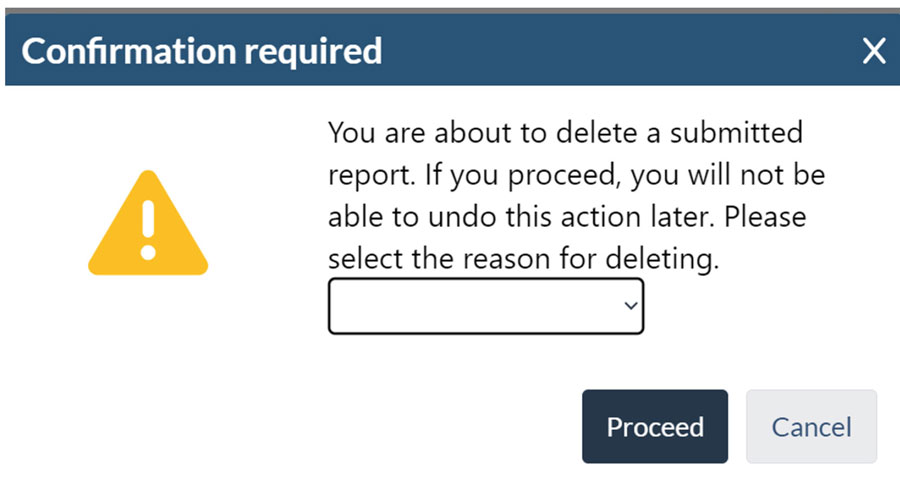
After a report has been submitted, the reporting entity administrator can delete the report by locating it in the submitted reports list and clicking the Delete icon. A confirmation prompt will appear on screen with a drop-down indicating the reason for deletion (see Figure 37). Reports can only be deleted if they are a duplicate or submitted in error. Once a report is deleted it can not be retrieved.
Appendix A
Standard batch reporting instructions and specifications
- Module 1: General specifications
- Module 2: Suspicious Transaction Report specifications
- Module 3: Large Cash Transaction Report specifications
- Module 4: Non-SWIFT Electronic Funds Transfer Report specifications
SWIFT batch reporting instructions and specifications
XML batch reporting instructions and specifications
XML schema
Note: The XML schemas are in .TXT files, you should save them as .XSD files.

Codes for error messages
Reporting related codes
In your batch reports you will be required to provide codes for information about countries, provinces, territories, states, currency, etc. The attached tables provide the necessary codes. Two formats are offered for better accessibility TXT=text format and XLS= Microsoft Excel.
- Currency codes
- Country codes
- Canadian Province or Territory codes
- Codes for the States of the United States
- Codes for the States of Mexico
- Codes for commonly used terms
- Codes for commonly used address terms
Related guidance
- Reporting large cash transactions to FINTRAC
- Reporting large virtual currency transactions to FINTRAC
- Reporting suspicious transactions to FINTRAC
- Reporting electronic funds transfers to FINTRAC
- Reporting casino disbursements to FINTRAC
- Date Modified: